
Instructions connecting your Microsoft ERP system with BridgeHaul for automated and seamless order management.
The process consists of three steps:
1. Register the external application in Azure Active Directory
2. Create the external application account in Business Central
3. Enter your credentials into the Integration section of the BridgeHaul TMS
For connecting with Dynamics from Bridgehaul, ensure you note the Client ID, Secret, and Tenant ID from step 1.
Step 1: Register the external application in Azure Active Directory
Create the application in Azure.
- Navigate to Azure portaland open Azure Active Directory.
- Search for App Registrations.
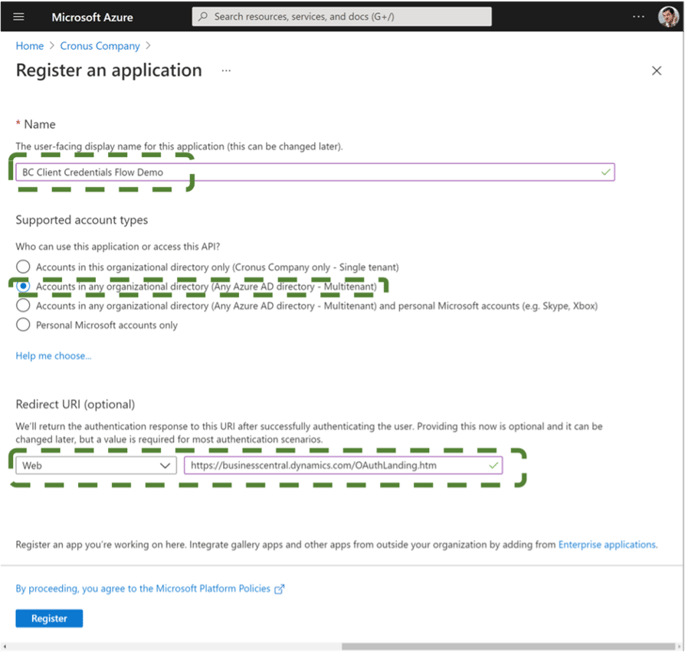
- Click on New registration.
- Fill in a name and choose Multitenant in Supported account types.
- Under Redirect URIchoose Web and then fill in this URL: https://businesscentral.dynamics.com/OAuthLanding.htm. Please note that this property is case-sensitive!
- Click on Registerto create the application. Copy the Application (client) ID. You’ll need it later.
Set the required permissions.
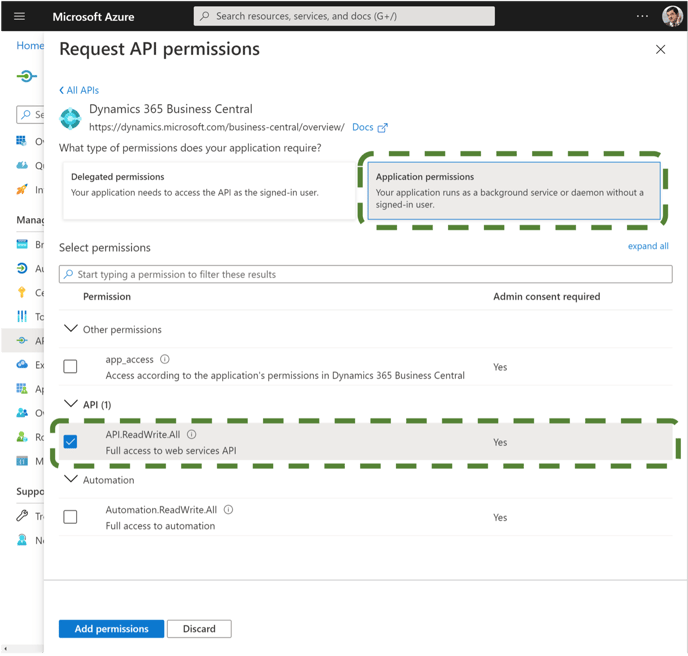
- Click on API permissionsin the menu.
- Click on Add a permission.
- From the list, select Dynamics 365 Business Central.
- select Application permissions.
- Select ReadWrite.All and click on Add Permissions to save the settings
Create a secret.
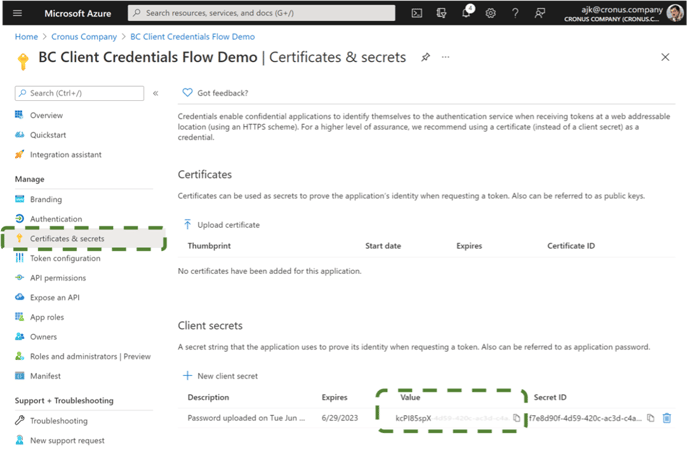
- Click on Certificates & secretsin the menu.
- Click on New client secret. Choose whatever expiration period you want and click on Add.
- Don’t forget to copy the created secret value because this is the only time you will be able to see it.
Grab the information.
Click on Overview in the menu and note the Application (client) ID and Directory (tenant) ID.
You will provide these values while connecting with Dynamics from Bridgehaul.
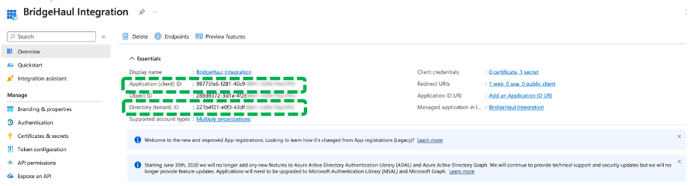
Now, you have the Client ID, Tenant ID and Secret
Step 2: Create the external application account in Business Central
Create the Azure Active Directory Application account.
- In Business Central search for Entra and open the page with name “Microsoft Entra Applications”.
- Click on Newto add a new record.
- Fill in the Client Id that you copied in the previous step. The curly brackets will be added automatically.
- Add any description.
- Change the state to Enabled
- Add User Permission Sets:
D365 BASIC,
D365 ITEM, VIEW,
D365 SALES DOC, EDIT
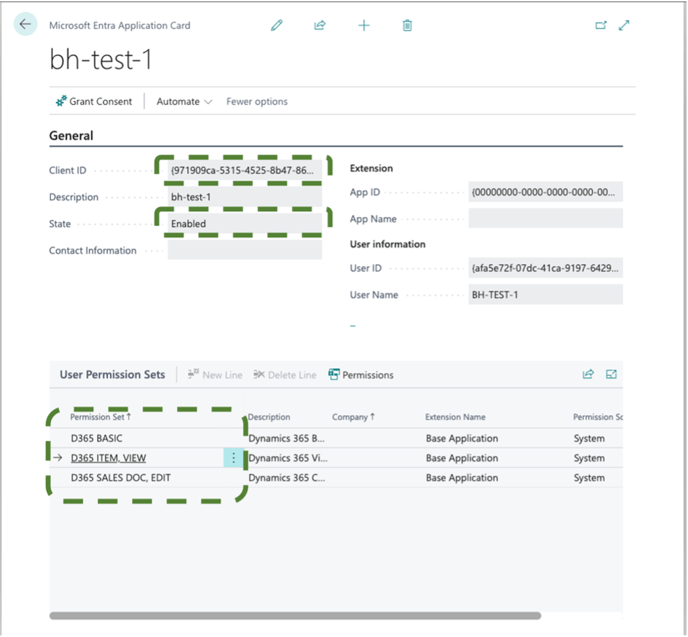
- Click on ‘Grant Consent’ from the top-left, it will pop-up a page that required you to log in.
(Note: User that gives consent needs to be a Global Administrator, an Application Administrator, or a Cloud Application Administrator) - After logging in, Click on ‘Accept’ and you’ll get a confirmation message in Business Central.
Congratulations, you have successfully finished the setup process. Please proceed to the Integration page on Bridgehaul and enter the Client ID, Tenant ID and Secret to establish a connection with Dynamics.