
Assigning an ELD Device to a Vehicle helps you keep track of which devices are in which vehicle, and also which driver is operating the vehicle.
Note: If you haven't purchased an ELD beforehand you will not see any active ELDs in your carrier dashboard. Purchase an ELD then head back over to the carrier dashboard, then continue with the steps in this guide.
If you haven't done so already, Add your vehicles to your carrier account first.
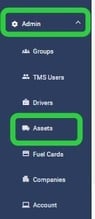
Go to Admin > Assest
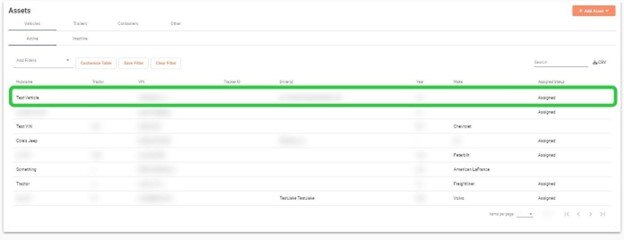
On the vehicle you would like to edit and assign the ELD to.
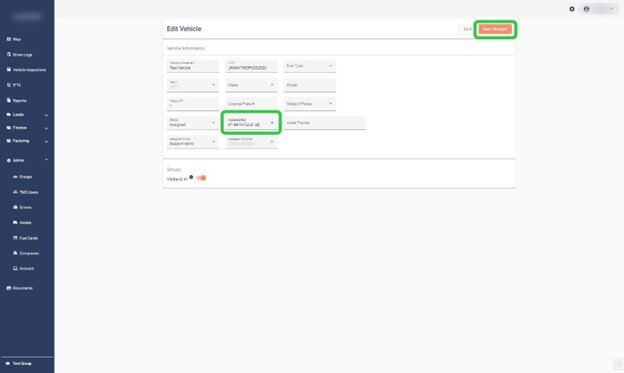
Enter the Vehicle's Details. There will be a drop-down menu titled "Assigned ELD", click the drop-down and select the ELD you'd like to associate with that particular vehicle. Then click Save.
If you're experiencing any issues regarding your carrier dashboard please feel free to reach out to our customer support team.